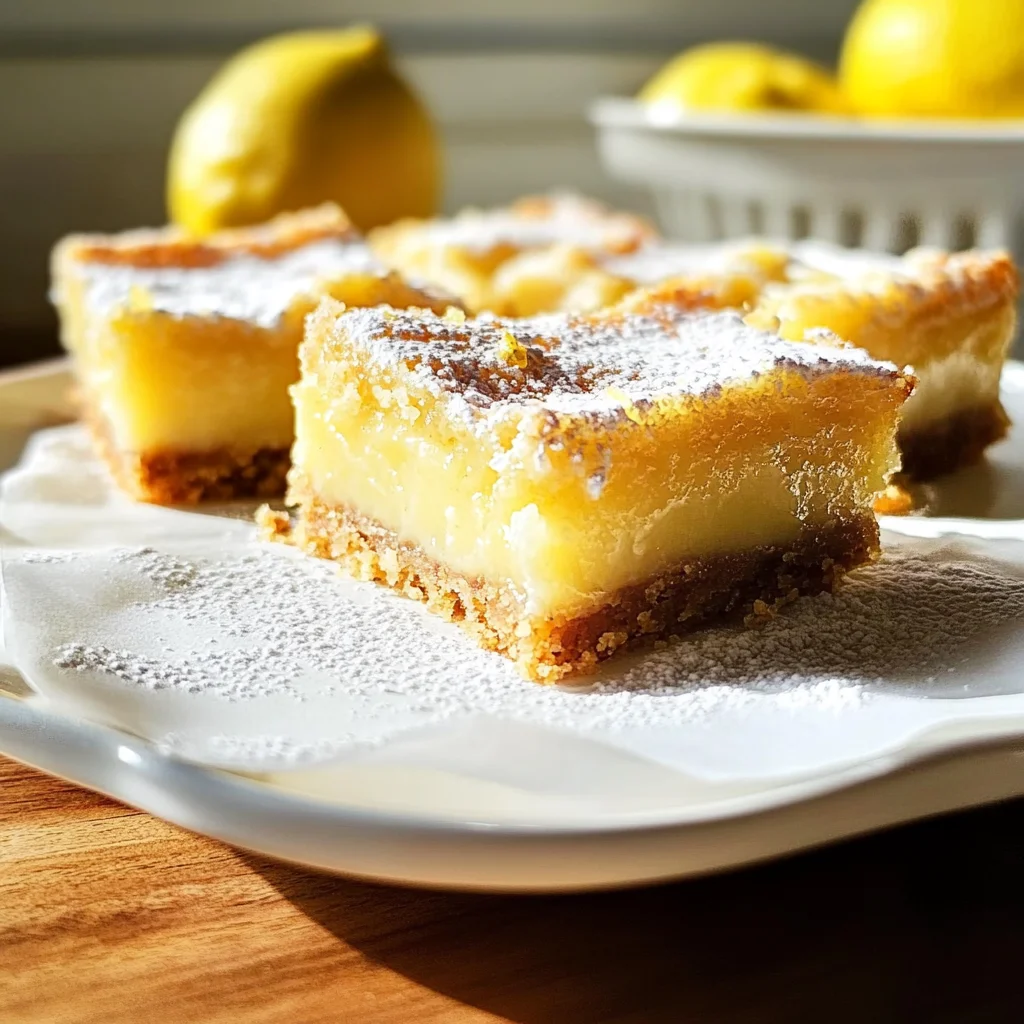
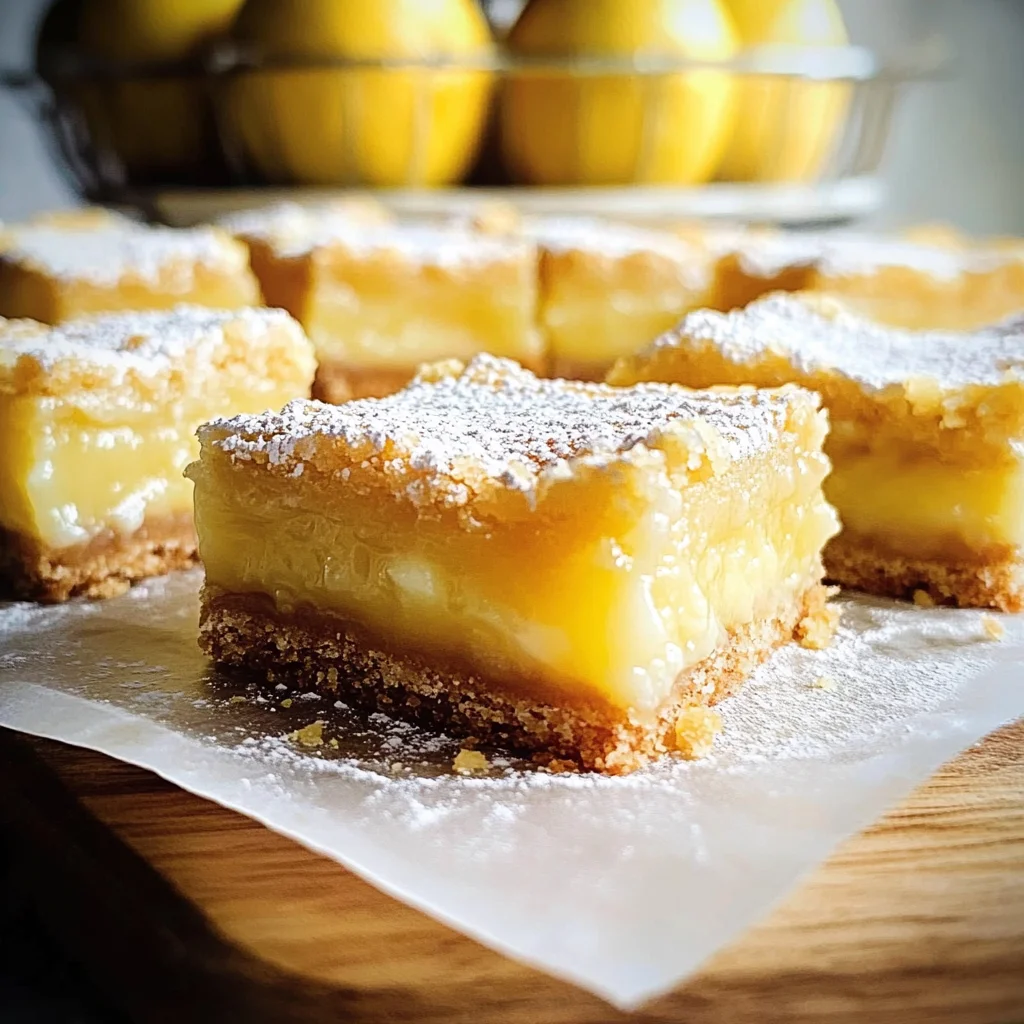
Lemon Bars
Lemon Bars are the perfect treat for any occasion, bringing a delightful balance of sweetness and tartness that everyone will love. These bars are not only easy to make but also incredibly versatile, making them a great choice for picnics, parties, or just a cozy afternoon snack. Whether you’re looking for a quick dessert or something to impress your guests, these Lemon Bars will surely stand out with their bright flavors and satisfying texture.
Why You’ll Love This Recipe
- Easy Preparation: With simple ingredients and straightforward steps, you can whip up these bars in no time.
- Bright Flavor: The combination of fresh lemon juice and zest creates a refreshing taste that’s hard to resist.
- Versatile Dessert: Perfect for any event, from family gatherings to casual get-togethers.
- Healthy Twist: Using honey instead of refined sugar adds natural sweetness while keeping the bars moist.
- Oat Crust Delight: The rolled oats provide a unique texture and flavor that complements the lemon filling beautifully.
Tools and Preparation
To make these delicious Lemon Bars, you’ll need some essential tools. Having the right equipment will streamline your cooking process and ensure perfect results every time.
Essential Tools and Equipment
- 9×9 inch baking pan
- Mixing bowls
- Whisk
- Rubber spatula
- Zester or grater
Importance of Each Tool
- 9×9 inch baking pan: This size is ideal for even baking, ensuring your bars cook uniformly.
- Mixing bowls: Having multiple sizes allows you to easily combine ingredients without mess.
- Whisk: A whisk helps incorporate air into the mixture, giving your filling a light texture.
Ingredients
For the Crust
- 1/2 cup (113 grams) unsalted butter
- 1/2 cup (100 grams) granulated sugar
- 1 cup (92 grams) rolled oats
- 1/4 cup (31 grams) all-purpose flour or whole wheat pastry flour
- 1 tablespoon milk (optional)
For the Filling
- 4 large eggs
- 1/2 cup (160 grams) honey
- 1 tablespoon lemon zest
- 1/2 cup (120 ml) freshly squeezed lemon juice
- 1/4 cup (31 grams) all-purpose flour
How to Make Lemon Bars
Step 1: Preheat the Oven
Preheat your oven to 350°F (175°C). This is an important step to ensure even baking.
Step 2: Prepare the Crust
- In a mixing bowl, cream together the unsalted butter and granulated sugar until light and fluffy.
- Add in the rolled oats and flour; mix until combined.
- If desired, stir in the milk to help bind the crust.
- Press this mixture evenly into the bottom of your greased 9×9 inch baking pan.
Step 3: Bake the Crust
Bake in the preheated oven for about 15 minutes or until golden brown around the edges. Remove from oven and let cool slightly while preparing the filling.
Step 4: Make the Filling
- In another bowl, whisk together eggs, honey, lemon zest, fresh lemon juice, and flour until smooth.
- Pour this mixture over your baked crust evenly.
Step 5: Bake Again
Return to the oven and bake for an additional 20-25 minutes or until set in the center.
Step 6: Cool and Serve
Allow your Lemon Bars to cool completely in the pan before cutting into squares. Enjoy!
How to Serve Lemon Bars
Lemon bars are a delightful treat that can be served in various ways to enhance their flavor and presentation. Here are some creative serving suggestions to ensure your lemon bars shine at any gathering.
With Fresh Berries
- Serve with a mix of fresh strawberries, blueberries, and raspberries for a burst of color and flavor.
Topped with Whipped Cream
- A dollop of whipped cream adds richness and balances the tartness of the lemon.
Drizzled with Honey
- A light drizzle of honey over each bar complements the lemon’s acidity and adds natural sweetness.
Paired with Ice Cream
- Serve warm lemon bars alongside a scoop of vanilla or coconut ice cream for a delightful contrast in temperatures.
Garnished with Mint
- Fresh mint leaves on top not only look appealing but also add a refreshing aroma that enhances the overall experience.
How to Perfect Lemon Bars
Making perfect lemon bars requires attention to detail. Here are some tips to help you achieve the best results.
-
Chill before serving: Allow your lemon bars to cool completely, then refrigerate for at least an hour. This helps set the filling and makes cutting easier.
-
Use fresh lemons: Freshly squeezed lemon juice yields the brightest flavor compared to bottled juice. Always opt for fresh when possible.
-
Adjust sweetness: If you prefer your lemon bars sweeter, feel free to adjust the amount of honey in the recipe according to your taste.
-
Bake evenly: Ensure your oven is properly preheated and consider using an oven thermometer for accuracy. Baking evenly prevents over or undercooked edges.
-
Dust with powdered sugar: Before serving, sprinkle powdered sugar on top for added sweetness and an elegant finish.
Best Side Dishes for Lemon Bars
Pairing side dishes with your lemon bars can elevate the experience. These options complement their bright flavors perfectly.
-
Fruit Salad: A vibrant mix of seasonal fruits adds freshness and balances the sweetness of the dessert.
-
Herbed Couscous: Lightly seasoned couscous provides a savory contrast that works well with the tangy notes of lemon bars.
-
Green Salad: A simple green salad with vinaigrette offers a crisp texture and brightens up your dessert table.
-
Chilled Tea: Iced herbal or green tea refreshes the palate between bites of rich lemon bars.
-
Cheese Platter: A selection of mild cheeses pairs beautifully, creating a delightful balance between sweet and savory.
-
Pistachio Crumble: Crushed pistachios sprinkled on top add a nutty crunch that complements the smooth texture of lemon bars.
Common Mistakes to Avoid
Making Lemon Bars can be simple, but a few common mistakes can lead to less than perfect results. Here are some pitfalls to watch out for:
- Using cold butter: If your butter is cold, it won’t mix well with the sugar and dry ingredients. Always use softened butter for a smoother texture.
- Not measuring accurately: Incorrect measurements can throw off the balance of flavors and textures. Use a kitchen scale or measuring cups for precision.
- Overbaking: Leaving Lemon Bars in the oven too long can make them dry. Keep an eye on them and start checking for doneness a few minutes before the suggested baking time.
- Skipping the zest: The lemon zest adds essential flavor. Don’t omit it; instead, grate the outer peel of the lemon finely to enhance your bars.
- Using bottled lemon juice: Freshly squeezed lemon juice has a brighter taste compared to bottled versions. Always opt for fresh lemons for the best flavor.
Storage & Reheating Instructions
Refrigerator Storage
- Store Lemon Bars in an airtight container in the refrigerator.
- They will last up to one week when properly stored.
Freezing Lemon Bars
- Wrap individual bars tightly in plastic wrap, then place them in a freezer-safe container.
- Frozen Lemon Bars can be kept for up to three months.
Reheating Lemon Bars
- Oven: Preheat your oven to 350°F (175°C). Place bars on a baking sheet and warm for about 10-15 minutes.
- Microwave: Heat one bar at a time on medium power for about 20-30 seconds until warmed through.
- Stovetop: Place bars in a non-stick skillet over low heat, flipping occasionally until warmed through.
Frequently Asked Questions
Here are some common questions about making Lemon Bars that might help you along the way.
How To Make Lemon Curd Bars?
To make Lemon Curd Bars, follow the same recipe but focus on creating a thicker lemon curd layer by cooking it gently over simmering water until it thickens.
How To Make Oatmeal Lemon Bars?
You can replace part of the crust with rolled oats. Combine oats with flour and butter for a delicious twist on traditional Lemon Bars.
Can I Make Lemon Bars Without Eggs?
Yes! You can substitute eggs with flaxseed meal mixed with water or silken tofu as an alternative binding agent.
What’s The Best Way To Cut Lemon Bars?
For clean cuts, let them cool completely before slicing. Use a sharp knife dipped in hot water for easier cutting.
How To Make Quick Lemon Bar Baking?
Use pre-made crusts or opt for quick no-bake recipes that set in the fridge. This saves time while still delivering delicious results.
Final Thoughts
These Lemon Bars are perfect for any occasion, offering a delightful balance of sweet and tangy flavors. Their versatility allows you to customize them with different citrus fruits or toppings like powdered sugar or whipped cream. Give this easy recipe a try and impress your friends and family!
Lemon Bars

Lemon Bars are a zesty delight that perfectly balances sweetness and tanginess, making them an ideal treat for any gathering. These bars feature a buttery oat crust topped with a creamy lemon filling that’s both refreshing and satisfying. Perfect for picnics, parties, or a cozy afternoon snack, this easy-to-follow recipe will impress your guests while providing a burst of bright flavors in every bite. With the added health benefits of honey instead of refined sugar, these Lemon Bars offer a delicious twist that’s sure to become a favorite.
- Prep Time: 15 minutes
- Cook Time: 35 minutes
- Total Time: 50 minutes
- Yield: Approximately 12 servings 1x
- Category: Dessert
- Method: Baking
- Cuisine: American
Ingredients
- 1/2 cup unsalted butter
- 1/2 cup honey
- 1 cup rolled oats
- 1/4 cup all-purpose flour
- 4 large eggs
- 1 tablespoon lemon zest
- 1/2 cup freshly squeezed lemon juice
Instructions
- Preheat your oven to 350°F (175°C).
- In a mixing bowl, cream together the softened butter and honey until light and fluffy.
- Add rolled oats and flour; mix until combined.
- Press mixture evenly into the bottom of a greased 9×9 inch baking pan.
- Bake for 15 minutes or until golden brown around the edges.
- In another bowl, whisk together eggs, lemon zest, lemon juice, and flour until smooth.
- Pour filling over baked crust and return to the oven; bake for an additional 20-25 minutes.
- Allow cooling completely before cutting into squares.
Nutrition
- Serving Size: 1 square (45g)
- Calories: 160
- Sugar: 10g
- Sodium: 50mg
- Fat: 8g
- Saturated Fat: 5g
- Unsaturated Fat: 3g
- Trans Fat: 0g
- Carbohydrates: 20g
- Fiber: 1g
- Protein: 3g
- Cholesterol: 55mg