Halloween Witch Hat Cookies
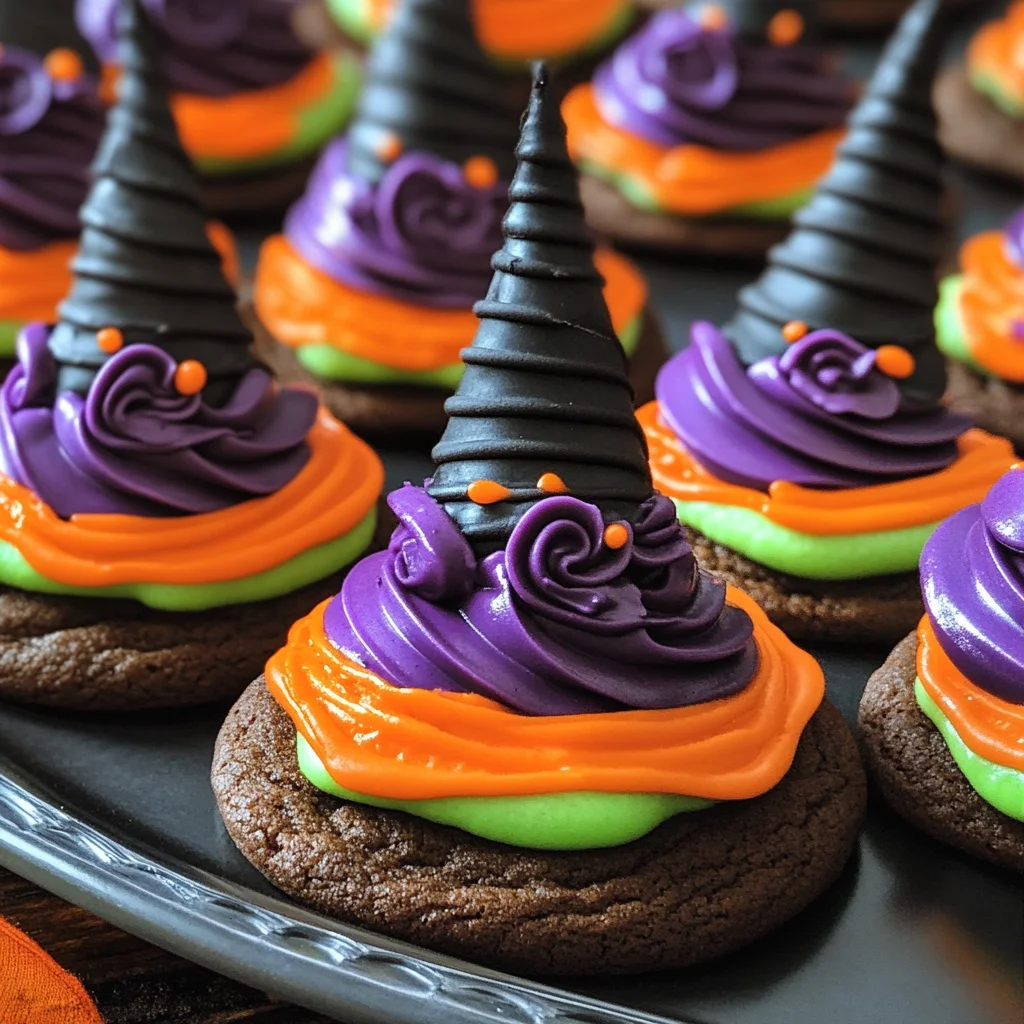
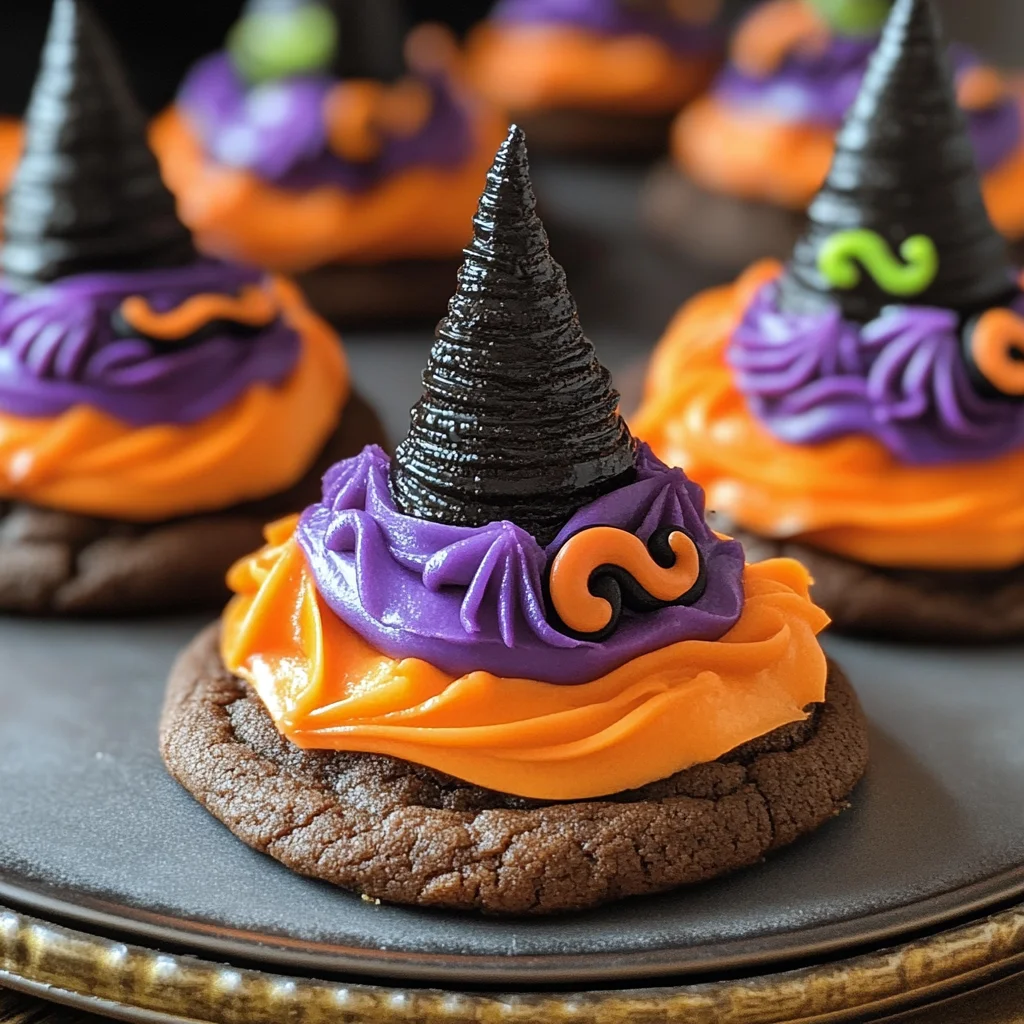
These Halloween Witch Hat Cookies are the perfect treat to impress your guests this spooky season. They are a fun project to do with kids and can be customized in many ways. Whether for a Halloween party or just for fun, these chocolaty cookies will surely delight all the ghouls and goblins.
Why You’ll Love This Recipe
- Fun for Kids: This recipe is a great way to involve children in baking, making it an enjoyable family activity.
- Customizable Designs: Use different colors and decorations to create unique witch hats that reflect your style.
- Deliciously Chocolaty: The combination of cake mix and chocolate cookies offers a rich flavor that everyone will love.
- Perfect for Parties: These cookies make an eye-catching addition to any Halloween gathering or dessert table.
- Easy Steps: The straightforward instructions ensure that even novice bakers can create these delightful treats with ease.
Tools and Preparation
Before starting your cookie-making adventure, gather the necessary tools. Having everything ready will make the process smoother and more enjoyable.
Essential Tools and Equipment
- Cookie sheet
- Cupcake Cones Baking Rack
- Parchment paper
- Decorating bags
- Spatula
Importance of Each Tool
- Cookie sheet: A sturdy surface ensures even baking for your witch hat cookies.
- Cupcake Cones Baking Rack: This tool helps hold the sugar cones securely while filling them with batter, preventing spills.
- Parchment paper: Using parchment paper makes cleanup easy and prevents sticking during the decorating process.
- Decorating bags: These allow for precise icing application, making it easier to create those charming witch hats.
Ingredients
For the Cake Mix
- Favorite Cake Mix or Try Wilton’s Chocolate Cake Recipe
For the Cookies
- Store Bought Chocolate Cookies or Try This Recipe from Wilton
For the Icing Colors
- Lemon Yellow Icing Color
- Black Color Mist Food Coloring Spray
- Rose Icing Colors Pink Food Coloring
- Violet Icing Color, Gel Food Coloring
- Golden Yellow Icing Color
- Orange Icing Color
For the Witch Hats
- Sugar Cones
- Creamy White Decorator Icing, 4 lb. Tub
How to Make Halloween Witch Hat Cookies
Step 1: Prepare & Bake the Cones
- Prepare the cake mix according to the instructions provided in your chosen recipe.
- Place the Cupcake Cones Baking Rack onto a cookie sheet.
- Insert sugar cones into the rack and fill each cone with 2 tablespoons of cake batter.
- Bake and cool the cones based on the timing instructions from your selected recipe.
Step 2: Spray the Cones
- If necessary, use a knife to trim any excess cake that rose above the top of each cone.
- Place cones wide side down on parchment paper.
- Spray the cones with Black Color Mist until fully colored.
- Allow them to dry for about 10 to 15 minutes.
Step 3: Tint the Icing & Prepare the Bags
- Tint 1 cup of creamy white decorator icing orange.
- Create purple icing by mixing violet and rose icing colors into another cup of white icing.
- Prepare two decorating bags with tip 2B; fill one with orange icing and one with purple icing.
- In another bowl, tint ¼ cup of creamy white decorator icing yellow using golden yellow and lemon yellow colors, then place it in a decorator bag with tip 3 attached.
Step 4: Assemble the Witch Hats
- Pipe a small amount of orange icing on top of a cookie, then place a cone on top.
- With tip facing outward, pipe a band around half of the wide ends of cones, smoothing it out with a spatula afterward.
- Repeat this step using purple icing on the remaining cookies and cones.
- Let them set for about 15 to 20 minutes.
- Finally, use yellow tinted icing (tip 3) to pipe a buckle around each hat’s band before letting them set again for another 15 to 20 minutes before enjoying!
How to Serve Halloween Witch Hat Cookies
These Halloween Witch Hat Cookies are not only delightful to look at but also fun to serve at your Halloween gatherings. Here are some creative ways to present them that will surely enchant your guests.
On a Festive Platter
- Arrange cookies on a colorful platter decorated with Halloween-themed items like mini pumpkins or spider webs for an eye-catching display.
With Milk or Hot Chocolate
- Serve these cookies alongside chilled milk or warm hot chocolate for a comforting treat, perfect for the spooky season.
As Party Favors
- Package individual cookies in clear bags tied with orange ribbon. These make great take-home treats for guests to enjoy later.
At a Dessert Table
- Include the cookies on a dessert table filled with other Halloween treats, such as cupcakes and candies, creating an impressive spread.
With Themed Labels
- Create little labels for each cookie type and place them next to the cookies. It adds a personalized touch and helps guests choose their favorites.
How to Perfect Halloween Witch Hat Cookies
For the best results when making Halloween Witch Hat Cookies, consider these helpful tips that will enhance both flavor and presentation.
-
Use quality ingredients: Choosing high-quality cake mixes and icing colors will significantly improve the taste and appearance of your cookies.
-
Be precise with piping: When decorating, use consistent pressure on your piping bags to create even bands of icing around the cones.
-
Cool completely before decorating: Ensure the baked cones cool down fully before applying any color mist or icing; this prevents melting and maintains shape.
-
Experiment with colors: Don’t hesitate to mix different shades of icing colors for unique designs that stand out among other treats.
Best Side Dishes for Halloween Witch Hat Cookies
Pairing side dishes with your Halloween Witch Hat Cookies can create a well-rounded dessert experience. Here are some tasty options to consider:
- Pumpkin Spice Cupcakes: These moist cupcakes topped with cream cheese frosting complement the chocolaty cookies perfectly.
- Candy Corn Parfaits: Layered cups of vanilla yogurt, fruit, and candy corn create a beautiful visual treat.
- Ghostly Fruit Skewers: Thread fruit pieces onto skewers with ghost-shaped marshmallows for a fun and healthy option.
- Chocolate-Dipped Pretzels: Sweet and salty pretzels dipped in chocolate add crunch and contrast to the soft cookies.
- Witch’s Brew Punch: A refreshing punch made from fruit juices can quench thirst while fitting perfectly into the Halloween theme.
- Spooky Cheese Platter: Offer assorted cheeses cut into fun shapes along with crackers for savory snacking alongside sweet treats.
- Caramel Apple Slices: Crisp apple slices drizzled with caramel provide a deliciously tart balance to the sweetness of the cookies.
- Mini Pumpkin Pies: Bite-sized pumpkin pies bring seasonal flavors that tie in beautifully with your Halloween cookie spread.
Common Mistakes to Avoid
Avoiding common pitfalls can make your Halloween Witch Hat Cookies even better. Here are some mistakes to watch out for:
-
Ignoring the baking time: Always follow the baking time in your recipe. Overbaking can lead to dry cookies, while underbaking may result in a gooey texture.
-
Skipping cooling time: Don’t rush the cooling process. Allowing your cones to cool completely before decorating helps the icing adhere better and prevents melting.
-
Using old ingredients: Ensure that your baking ingredients, like cake mix and food coloring, are fresh. Expired ingredients can affect the flavor and appearance of your cookies.
-
Not preparing enough icing: Make sure you have enough tinted icing ready for decorating. Running out midway can lead to uneven designs or mismatched colors.
-
Neglecting to set decorations: After assembling the witch hats, let them set properly. This will help maintain their shape and ensure the decorations stay in place.
Storage & Reheating Instructions
Refrigerator Storage
- Store your Halloween Witch Hat Cookies in an airtight container.
- They will last up to 5 days in the refrigerator.
Freezing Halloween Witch Hat Cookies
- Freeze cookies individually on a baking sheet before transferring to a freezer-safe container.
- They can be frozen for up to 3 months.
Reheating Halloween Witch Hat Cookies
- Oven: Preheat to 350°F (175°C). Place cookies on a baking sheet and heat for about 5-10 minutes.
- Microwave: Heat each cookie for about 10-15 seconds until warm.
- Stovetop: Use a skillet over low heat, placing a lid on top to warm through for 1-2 minutes.
Frequently Asked Questions
Here are some frequently asked questions about Halloween Witch Hat Cookies:
What are Halloween Witch Hat Cookies?
Halloween Witch Hat Cookies are fun, chocolaty treats shaped like witch hats, perfect for festive celebrations!
How can I customize my Halloween Witch Hat Cookies?
You can customize them by using different colors of icing or adding edible decorations like sprinkles or candy eyes.
Can I use a different cake mix?
Absolutely! Feel free to use any cake mix flavor you prefer for your Halloween Witch Hat Cookies.
How long do these cookies take to make?
The total time is around 1 hour and 45 minutes, including prep and baking time.
What should I do if I run out of icing?
If you run out of icing mid-decorating, simply prepare more using the same color-tinting method as before.
Final Thoughts
These Halloween Witch Hat Cookies are not just delightful treats; they also offer endless customization possibilities! Whether you’re hosting a party or enjoying a fun baking day with kids, this recipe is sure to impress. Don’t hesitate to try different colors and flavors to make them uniquely yours!
Halloween Witch Hat Cookies
Get ready to enchant your guests with these delightful Halloween Witch Hat Cookies! These fun, chocolaty treats are not only visually striking but also incredibly easy to make, making them perfect for a festive family baking session. With simple ingredients and customizable designs, you can create unique witch hats that will impress both kids and adults alike. Ideal for Halloween parties, school events, or just a cozy night in, these cookies bring a touch of whimsy to any gathering while satisfying your sweet tooth. Let’s dive into this fun recipe that’s sure to become a seasonal favorite!
- Prep Time: 30 minutes
- Cook Time: 15 minutes
- Total Time: 45 minutes
- Yield: Approximately 12 cookies
- Category: Dessert
- Method: Baking
- Cuisine: American
Ingredients
- Favorite cake mix (or Wilton’s Chocolate Cake Recipe)
- Store-bought chocolate cookies
- Sugar cones
- Creamy white decorator icing
- Lemon yellow icing color
- Black color mist food coloring spray
- Rose icing colors pink food coloring
- Violet icing color, gel food coloring
- Golden yellow icing color
- Orange icing color
Instructions
- Prepare the cake mix according to your chosen recipe.
- Insert sugar cones into a cupcake cone baking rack placed on a cookie sheet and fill each cone with 2 tablespoons of prepared batter.
- Bake according to the recipe instructions and let the cones cool completely.
- Spray cooled cones with black color mist until fully coated and let dry.
- Tint creamy white decorator icing with orange and purple colors as desired; prepare piping bags accordingly.
- Assemble by piping orange icing on top of a chocolate cookie, placing the cone on top, then decorating with icing bands.
- Allow decorations to set before serving.
Nutrition
- Serving Size: 1 cookie (45g)
- Calories: 190
- Sugar: 16g
- Sodium: 150mg
- Fat: 8g
- Saturated Fat: 3g
- Unsaturated Fat: 5g
- Trans Fat: 0g
- Carbohydrates: 28g
- Fiber: 1g
- Protein: 2g
- Cholesterol: 5mg


